Assign a Course (Trainer / Parent / Student)
This feature is for SA, ML, CA, Trainer
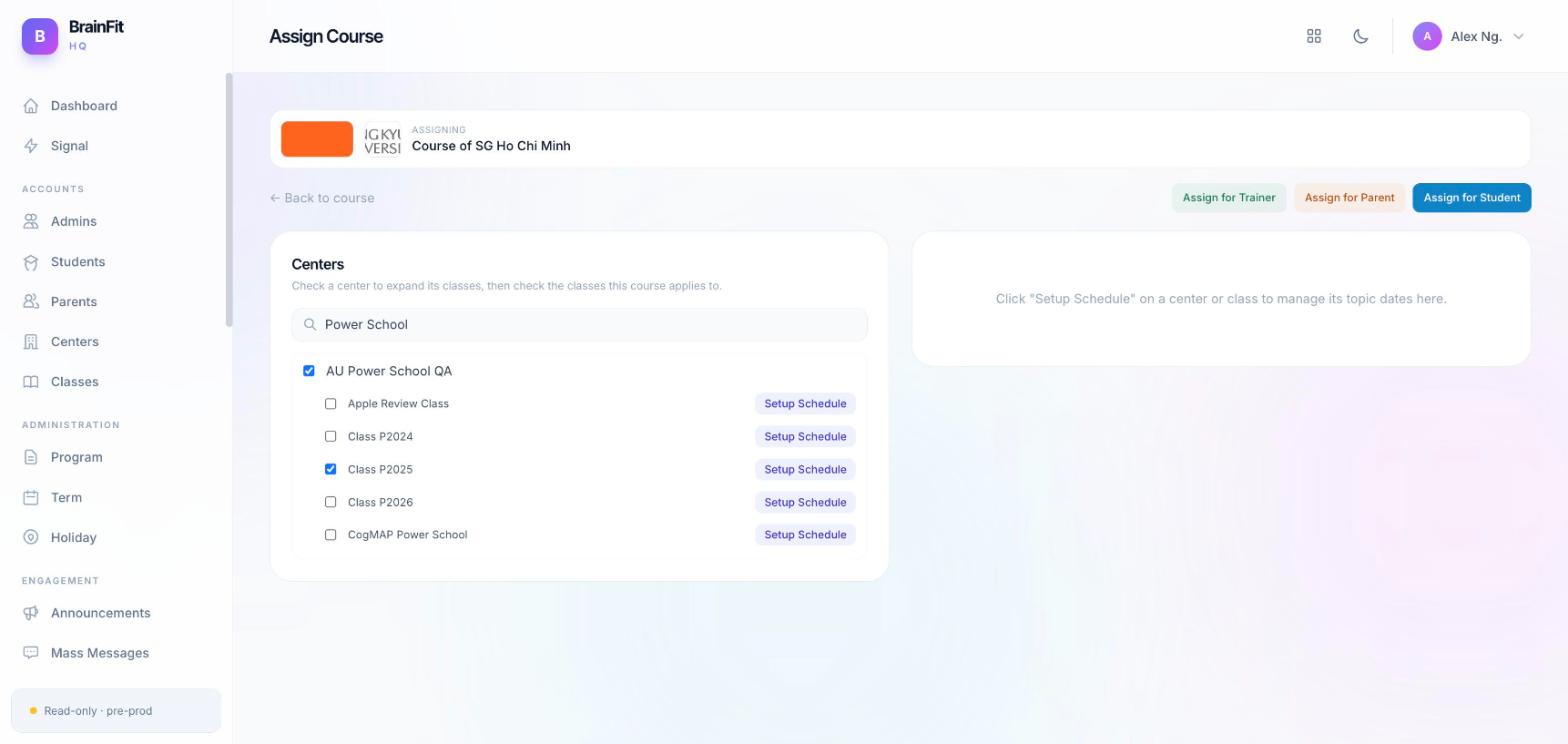
HQ's Assign screen replaces the older ACP assign flow with a single page that switches between three audiences — Trainer, Parent, and Student — and adds a schedule pacing option so topics don't have to land one-per-week.
Opening Assign
- From the Courses list, click Assign on a course. The page opens in Trainer context by default — pick a center, then check the trainers to assign. Use Back to course in the top-left to return to the course's Edit page (not the old detail view).
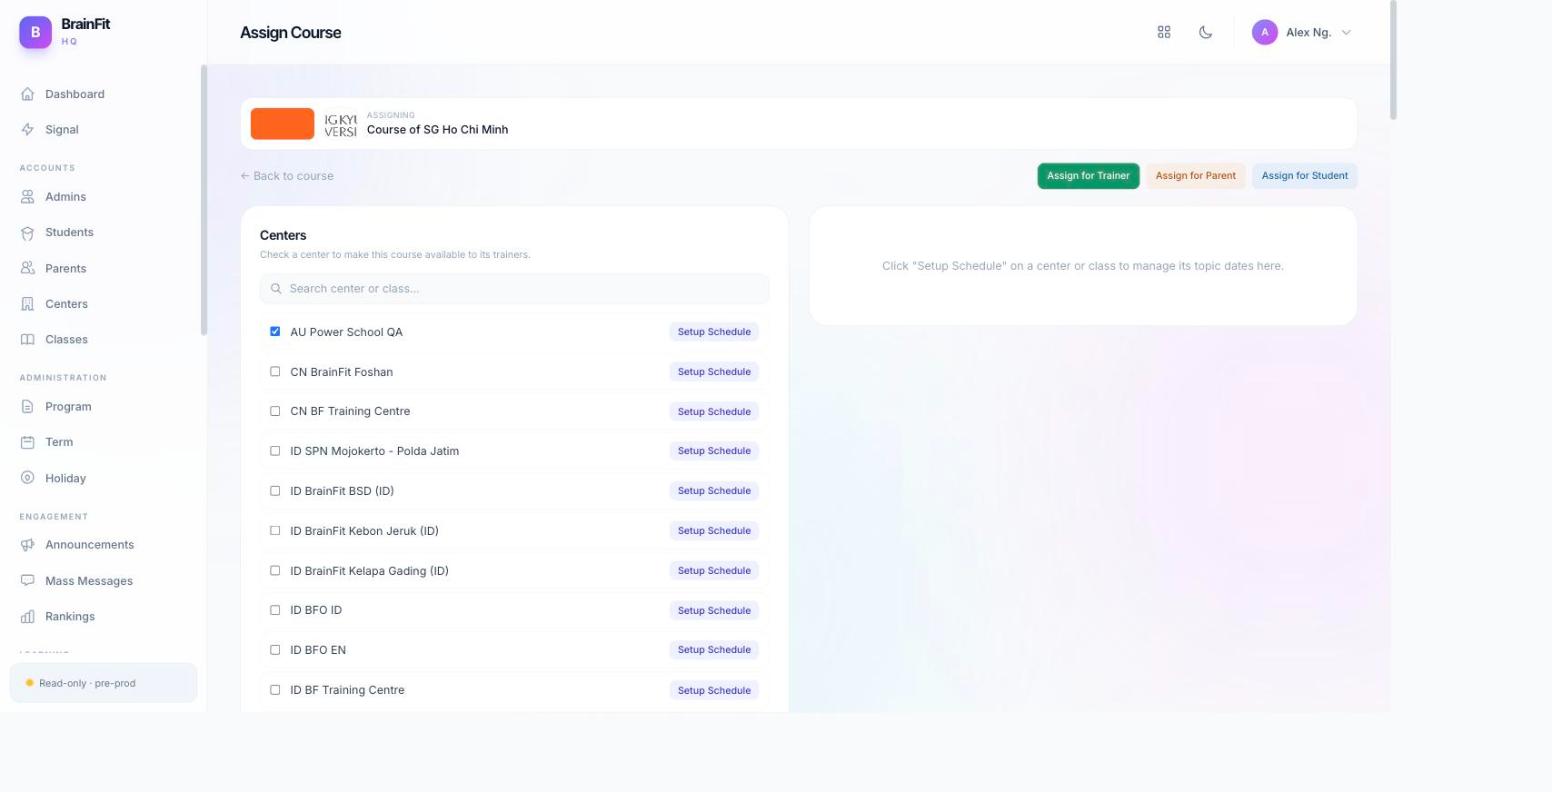
Setting up the schedule
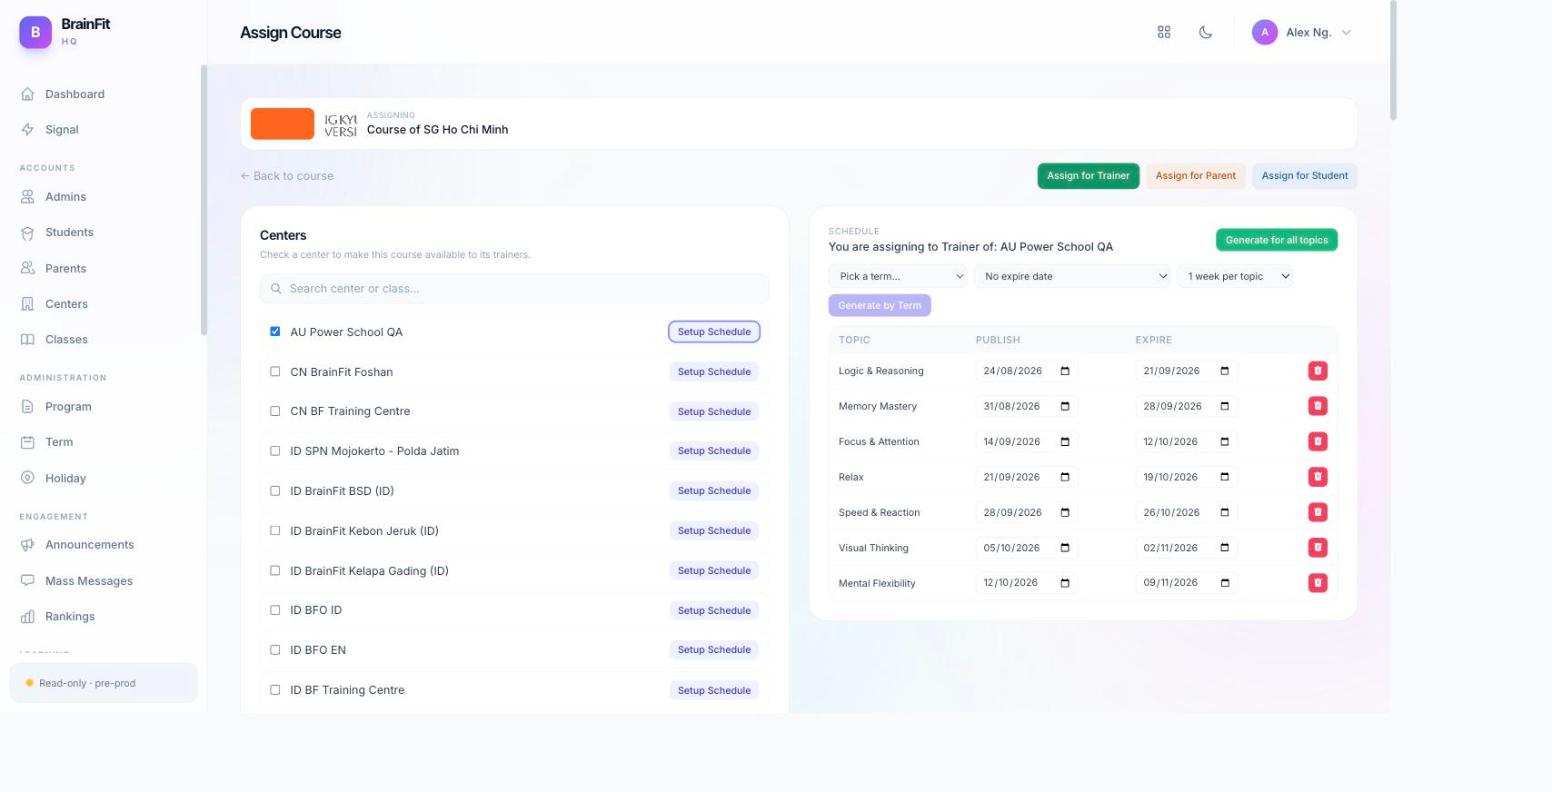
- Click Setup Schedule for a center to reveal the schedule panel — choose a Term, an optional expire date, and a Pacing (weeks per topic: 1, 2, or 5). The panel also shows any existing schedule rows for that center.
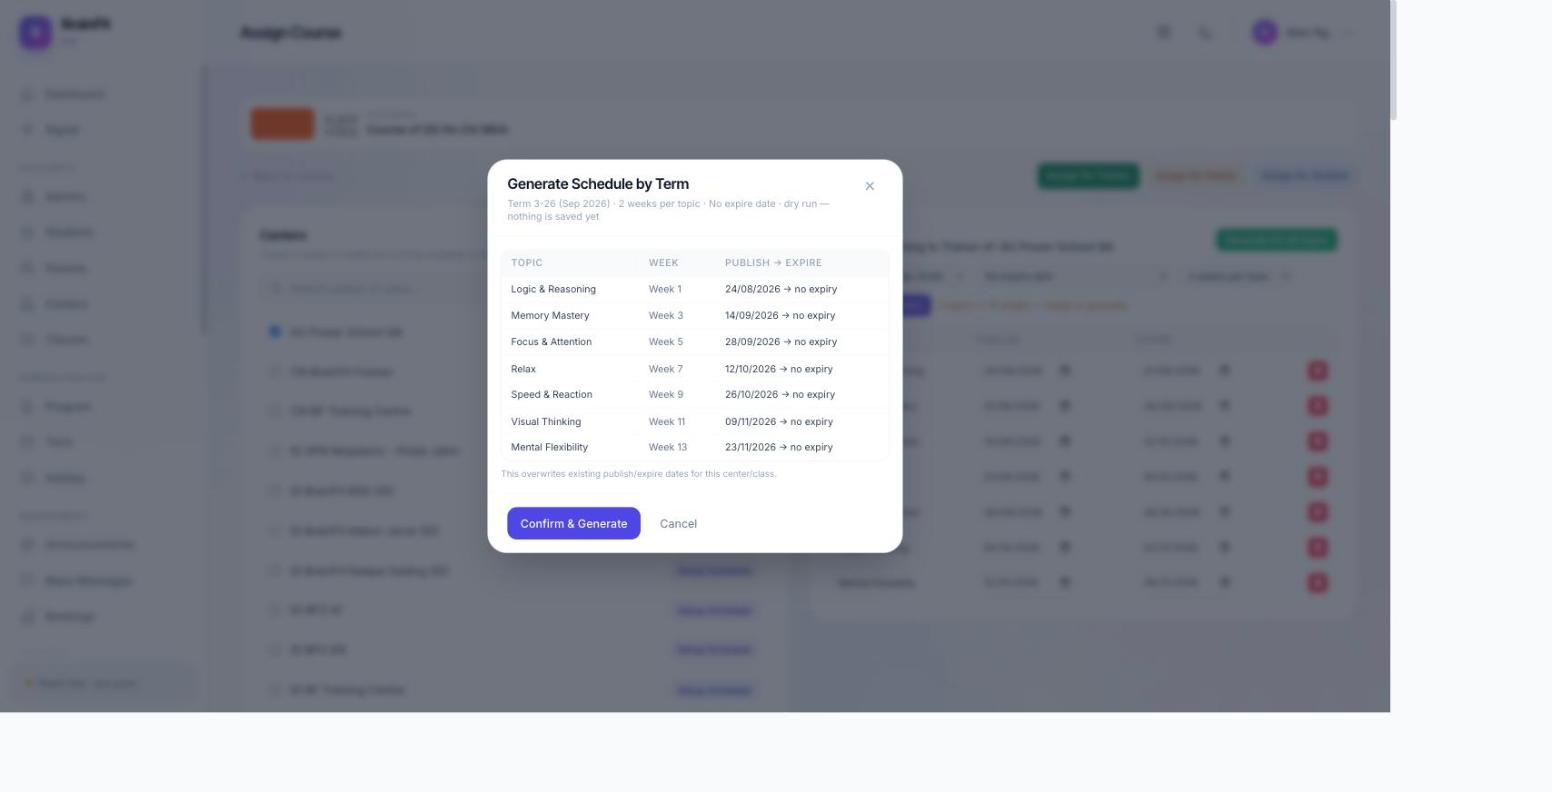
- Click Generate for Term to preview how topics land across the term at the chosen pacing, before anything is saved. The example below uses 2 weeks per topic — topic 1 lands on Week 1, topic 2 on Week 3, topic 3 on Week 5, and so on.
Assigning to Parents or Students
- Switch context to Parent to assign the course directly to a parent/customer account. Use the search box to filter by center or name, then expand a class to check the parents you want.
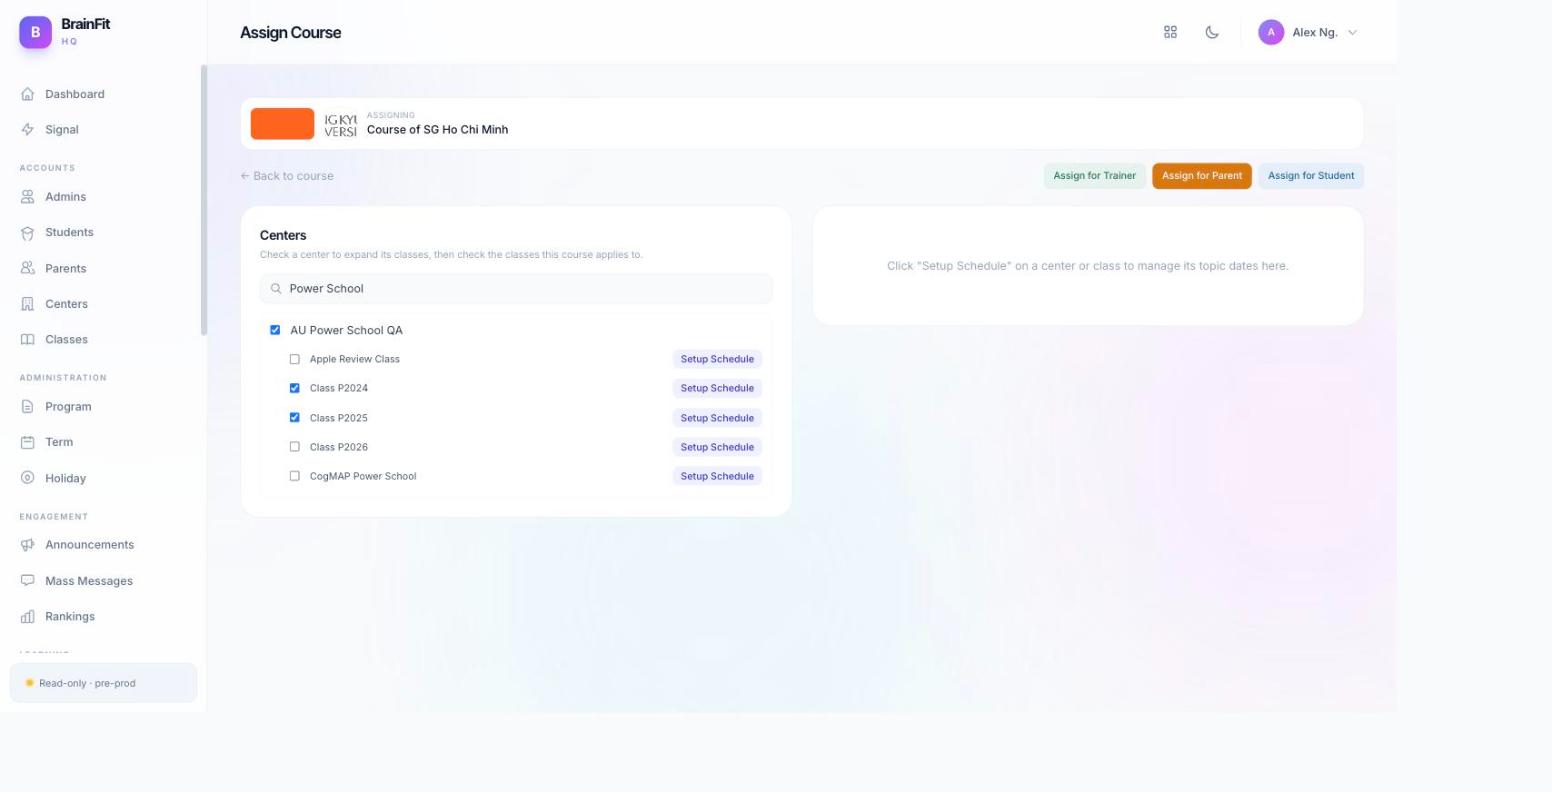
- Switch context to Student for the same flow, scoped to individual students instead.
Note:
- Pacing (1 / 2 / 5 weeks per topic) applies to both single-course Assign and Mass-assign — see Mass-assign Courses.